Getting started
Create your first project
Section titled “Create your first project”After you’ve successfully logged in, you will land on the dashboard. In the upper right corner, you can find the “Create new project” button. This will open a dialog where you can enter the name of your new project.
Additionally, you need to enter the base language of your project.
This will be the fallback language if a translation is missing in a specific language.
It is a language-country code, e.g. en-US for American English or de-DE for German (Germany).

Creating structures using groups
Section titled “Creating structures using groups”A project can only contain groups. Groups can contain other groups or entries. This will allow you to build a tree structure to organize your entries.
For example, you could create a group for “Pages” and then for each page of your website, you create a subgroup. Here you can see an example for a simple structure:
Directorypages/
Directoryhome/
- …
Directoryabout/
- …
Directorygeneral/
Directoryheader/
- …
Directoryfooter/
- …
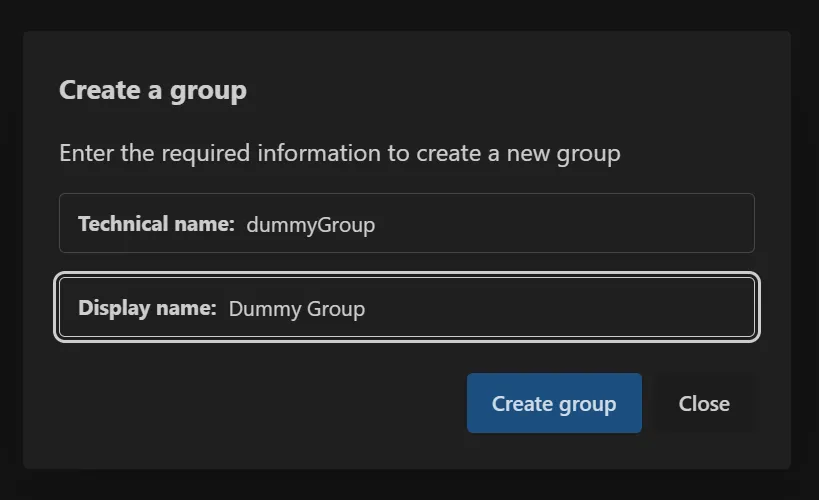
You need to create a group. You do this by opening the project and using the “Create group” button on the right hand site of the “Groups” area. When entering a group, you will find the same area with the same button to create subgroups.
A dialog will open where you can enter the technical name of the group and the display name.
The technical name will be used later for the generated translations and should be unique.
They need to follow a certain format. the first character must be a lowercase letter.
After that, you can use lowercase letters, uppercase letters and numbers.
Examples would be: pages, landingPage, error404, profilePage, and so on.
The display name is for the Collingo users and can be any string. Make sure it describes the group well, so other users can easily find the right group.
Add your first entries
Section titled “Add your first entries”TODO
Translate your first entries
Section titled “Translate your first entries”TODO